A joint board is a panel made by gluing smaller wooden boards together, joined edge to edge.
The most known board joining method is by a “butt” joint, which is created by gluing planed edges of two boards together.
Nowadays, joint board is usually created by a more advanced method. The edges are shaped by different profiles to increase the contact area, ensuring stronger bond.
Basic rules when joining boards:
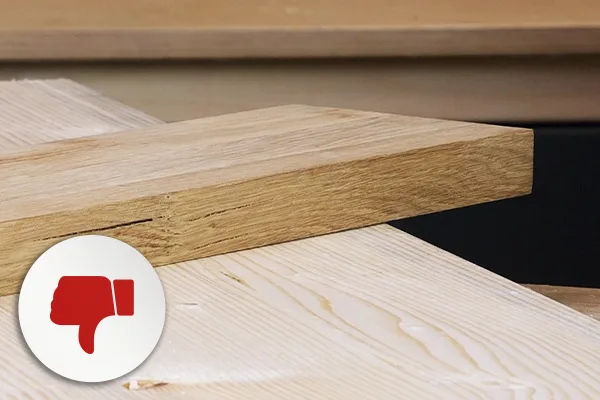
Always join boards, slats or other squared timber heartwood to heartwood and sapwood to sapwood.
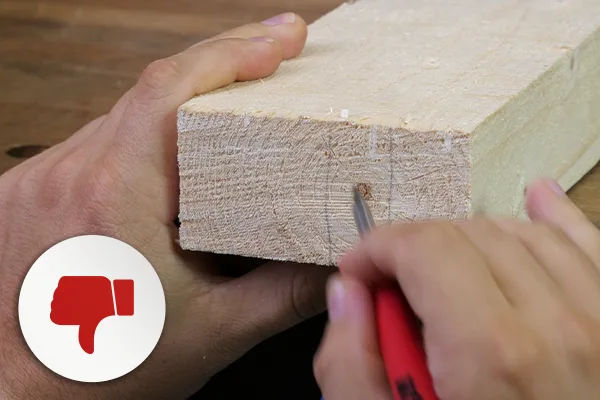
Never use the centre part (pith).
The boards must come from the same lumber with the same density.
Joining boards step-by-step
To shape the edges, we use profile knives with limiters on a spindle moulder. Then, the boards are glued together and the completed joint board is planed on a thickness planer.
The edges can also be shaped on a router table using a router and router bit.
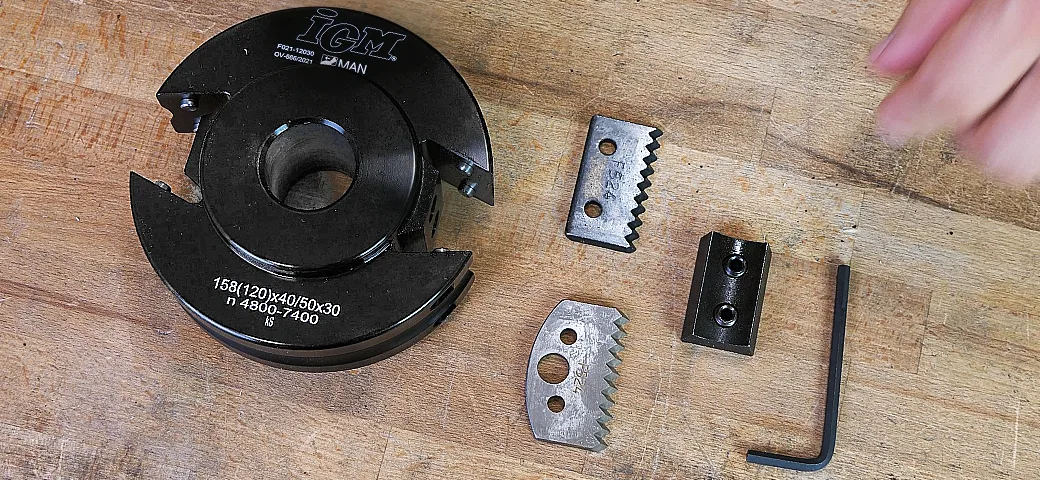
1. Choosing a profile knife
Firstly, we need to choose a suitable profile knife. For this particular project, we chose profile knife F026-524, to make a finger joint board. Larger surface of the finger joint increases the glued contact area. This joint is far stronger compared to a butt joint.
However, the contact area can be shaped by a different profile knife as well. For example, you can use knife 074, 075, 076, 077, 552 or 117.
Because we use the spindle moulder without a power feeder, we need universal cutter head MAN to manually feed the material. Limiters are required on this cutter head. Unlike the profile knife, the limiter is slightly shorter and does not have a sharp edge. Always use the same shape of knife and limiter! For this project, we chose limiters F027-524.
2. Choosing lumber
We chose planed spruce planks 1 meter long and 44 mm thick for this project.
You can choose any lumber and size for your joint board.
You only need to follow the three basic rules when joining boards, see above.
3. Inserting profile knives and limiters
To correctly insert profile knives and limiters into the cutter head, place it on a table so that the IGM logo is on top. Place the knives in the cutter head with the knife edge pointing counterclockwise. The knives have two small holes that should just fit on pins in the cutter head.
Then place the limiters in the cutter head, again on the pins. Position the limiters so that the tip points towards the tip of the knife. The limiters are pointing clockwise.
Once both the knives and limiters have been inserted, hold them with one hand and insert a wedge between, with your other hand. Wedge screw heads must point outwards.
Align the wedge with the cutter head body and tighten both wedge screws using the provided hex key. Securely tighten the screws so that the wedge does not move at all and holds the knife and limiter in place.
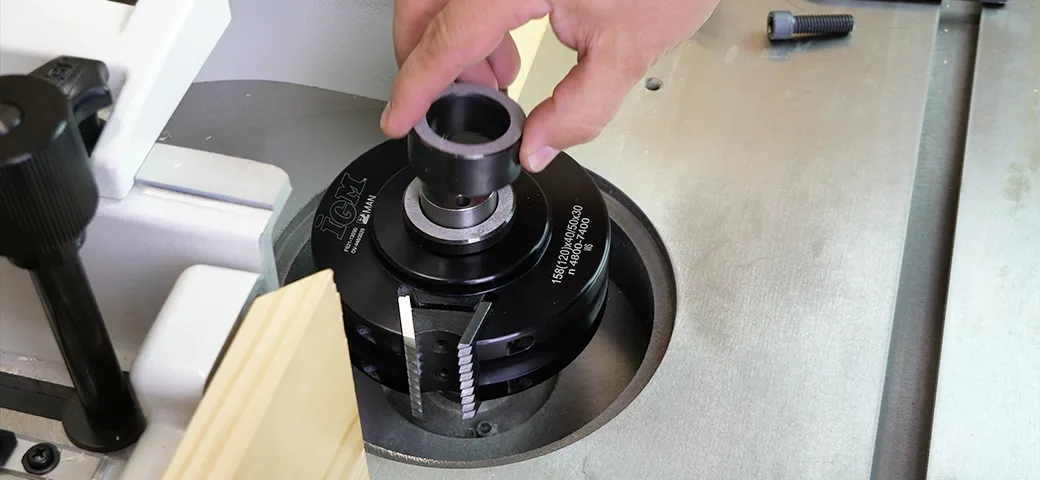
4. Mounting cutter head on spindle moulder
The cutter head can now be mounted on the shaft of the spindle moulder. Mount it with the IGM logo on top. Insert spacer rings and use the lock nut to securely tighten the cutter head.
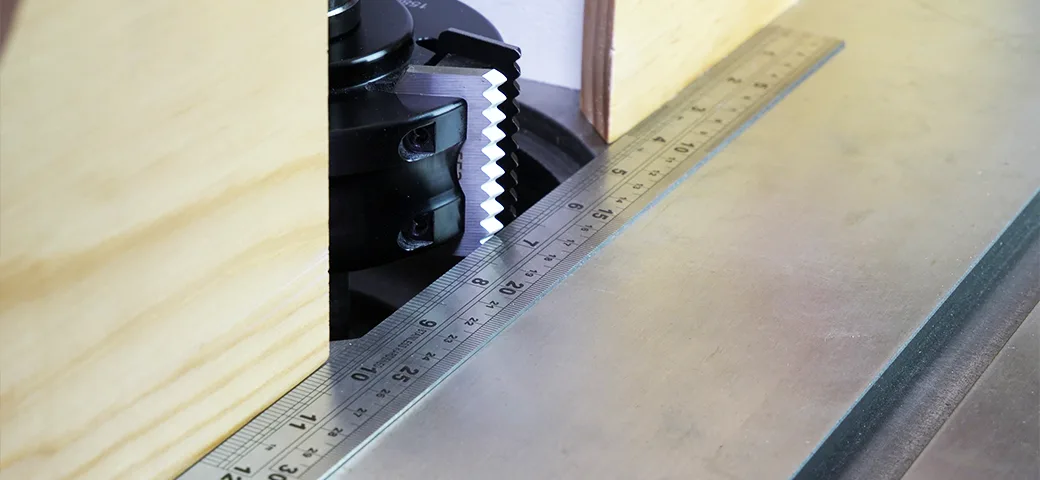
5. Setting cutter head to spindle moulder fence
The tool is mounted in the machine. Now we need to adjust the cutter head and fence. Turn the cutter head by hand to top dead centre. Dead centre is a cutter head position in which the knife points most outwards from the fence, toward the operator.
Align the fence with the deepest point of the profile using an aluminum ruler. This way, you will only shape the edge and not needlessly cut away material. Securely tighten the fence when aligned.
6. Adjusting cutter head and calculation
The cutter head is set according to the fence. All that is left to do is to adjust the height.
To do so, first measure exact thickness of the planks. In our case, we measured 44 mm. Find the exact centre of the profile knife. If the knife is 50 mm high, the centre is 25 mm from the knife edge.
Half the thickness of our boards is 22 mm, half the thickness of the knife is 25 mm. The difference is 3 mm. This means that the cutter head must be lowered below the table so that the bottom part of the knife is 3 mm below the table. Upper part of the knife should be 47 mm above the table. We can check it with a ruler or a scrap piece of wood.
7. Testing
Now that the fence and cutter head height is set, we can get to work. But first, we should make a sample to verify that the adjustments are correct and that the planks fit together.
If everything is correct, we can start joining.
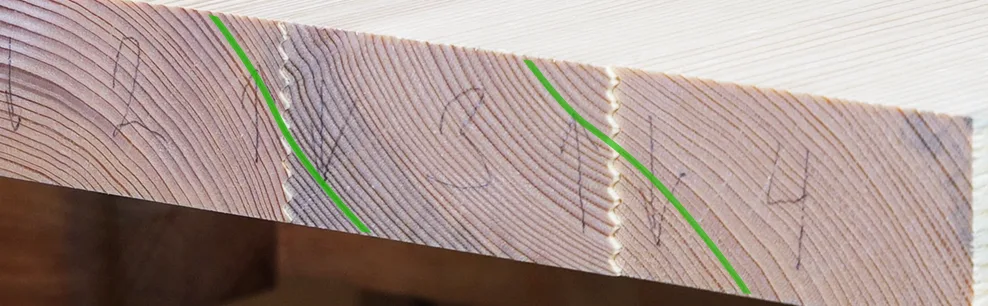
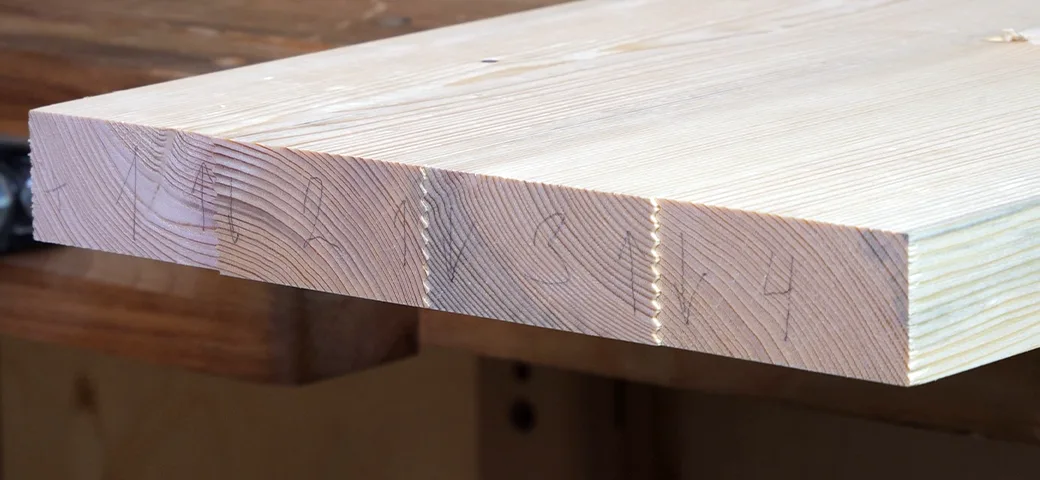
8. Joining and marking

The best way to properly join the planks is to lay them next each other and mark them. Planks on the edge will be joined only on one side, other planks must be shaped on both edges. To ensure the adjacent planks fit together, rotate every other plank 180° when making finger joints.
Mark every plank on the front before shaping edges, for example with arrows as shown. Or you can number the planks as well. The arrow is always only on the front and shows the orientation when shaping edges.
9. Shaping edges
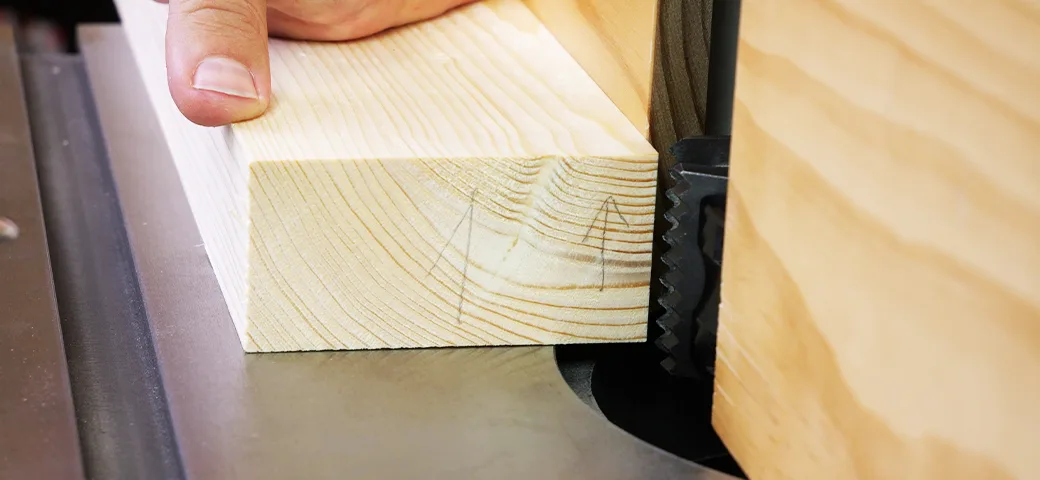
Shape only edges that have the arrow marking. The arrow must always point up. No arrow on one side of the outer plank means that one edge is not shaped.
10. Joining and gluing
The edges are shaped, now we just need to spread the glue. We used Titebond glue brush to spread the glue thoroughly. The most suitable glue for this joint is Titebond Ultimate with D4 water resistance providing maximum strength and durability.
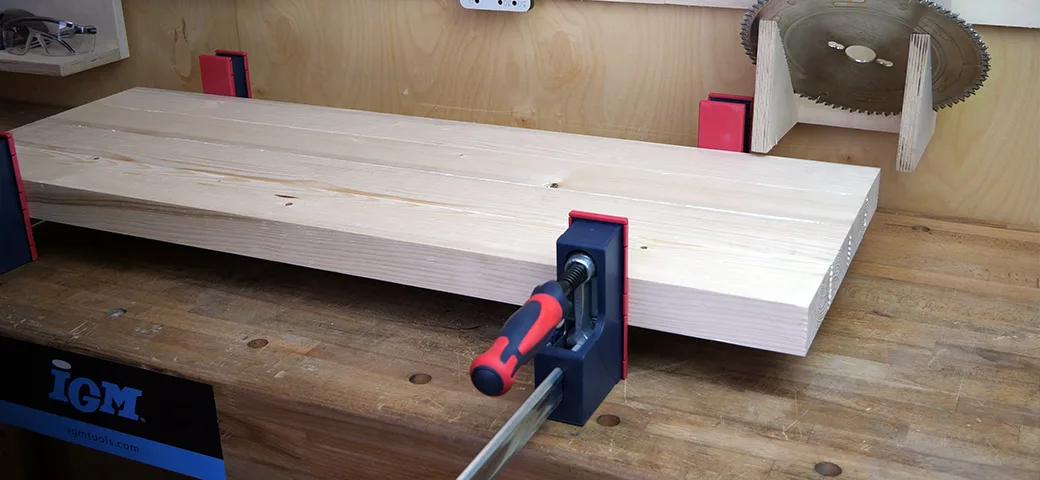
Glued planks should be securely clamped for at least 30 minutes. The glue is completely set after 24 hours. For our project, the most suitable clamps are IGM heavy duty parallel jaw clamps which exert clamping pressure up to 800 kg. Plastic jaw covers prevent damage to wood.
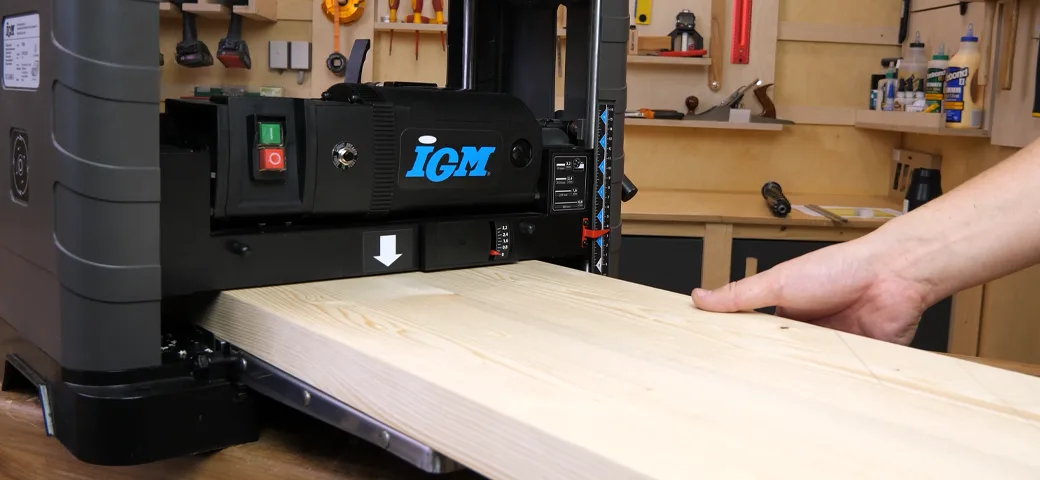
11. Planing joint board
After 30 minutes, remove the clamps and excess glue. The joint board is finished and can be planed. We can make all types of items from the joint board, such as a bench seat, table top or anything else that brings you joy.