Joinery basics: How to make a dovetail joint
For some reason, loads of woodworkers think that making a dovetail is the peak of their crafting career. Even though this practice is taught in the first year of high school. When I think about my first dovetail joint, I can't really talk about creating something highly artistic. Rather it was a well-bound joint. Then you cut a couple of them, they look presentable, and one starts to think it's the highest possible success in their production of dovetail joints.
It's true that dovetail is hard to make, but all it takes is a couple of stabs at the joint and even a novice will be happy about the results. Just take a look at what the Japanese make and you will be amazed of what they're capable of making abroad.
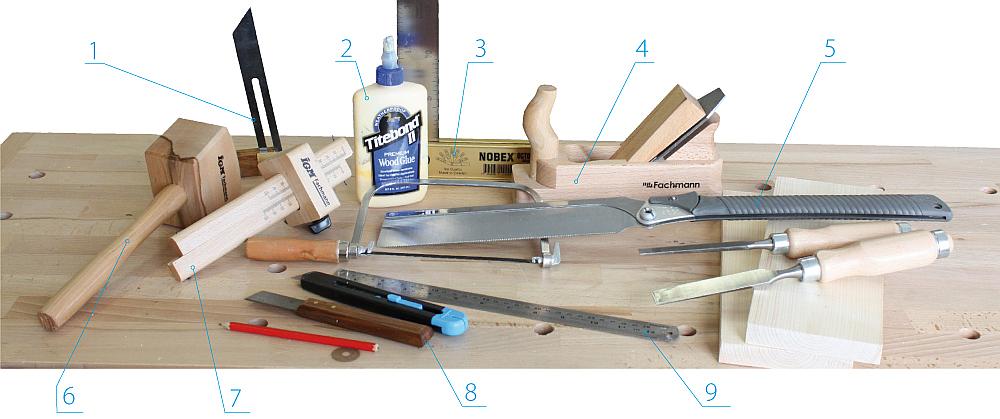
Necessary tools:
• 1 Carpenter Adjustable bevel, arm 180 mm
• 2 Titebond II Premium Wood Glue D3 - 237ml Plastic Bottle
• 3 Octo Folding Square - 200 mm
• 4 IGM Fachmann M970 Jack Plane
• 5 Silky Woodboy Dozuki Hand Folding Saw
• 6 IGM Fachmann Carpenter´s Mallet
• 7 IGM Fachmann Double Marking Gauge
• 8 Marking Knife
• 9 Steel Rule 300 mm
In the following articles, we will take a look at how to properly make a dovetail joining. Dovetail is used to join two pieces of wood. The beauty lies in the strength of the joint and its resistance to mechanical pull in one direction, which makes it ideal for the production of drawers.
The prerequisite for precise work is a proper preparation of wood. Each piece should be accurately evened out and all the edges should be exactly at the right angle.
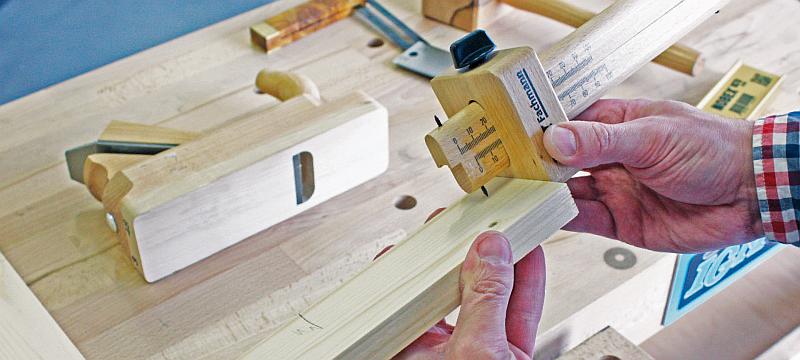
First, let's mark out a line signalling the depth of the joint. The line should be marked out a bit further from the edge, as the thickness of wood has to be accounted for, this will create a small overlap when completing the joint.
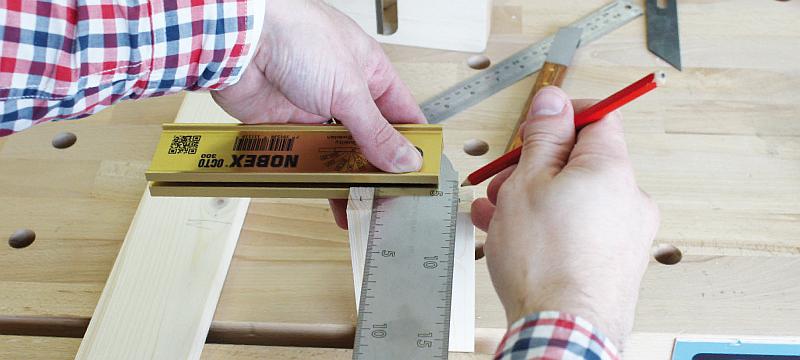
Step two is to mark out the two ‘half-pins’ at the edges. The ‘pins’ are the bits of wood between the tails and there are obviously two half-pins, one each side. The ‘pins’ are the bits of wood between the tails and there are obviously two half-pins, one each side. The general rule is that they measure half the thickness of timber plus around 1 mm along the shoulder line. So these two awl dots are 7 mm in from each edge.
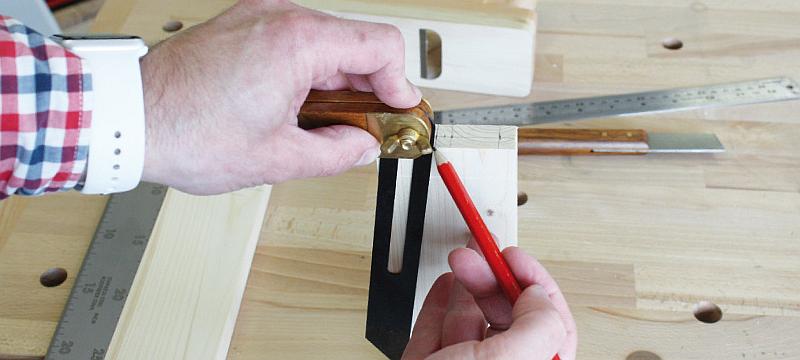
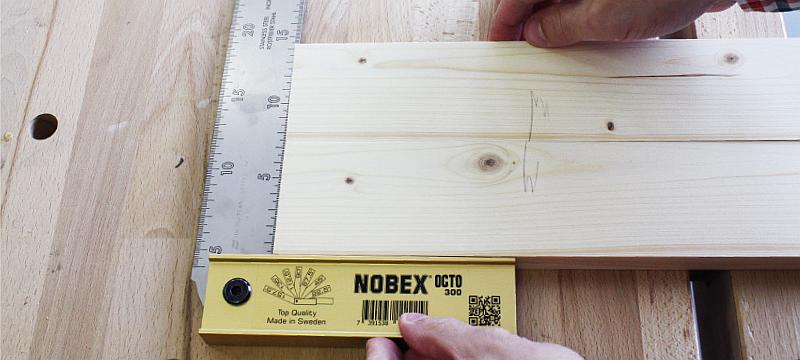
These two dots, which mark the corners of the half pins, are now converted into a 1:8 slope at each side. I want to make two dovetails, meaning I have to split the workpiece in the middle and mark out space in between the dovetails. Perceived wisdom is that there should be roughly one dovetail each 25 mm or so across the width. This isn’t written on a tablet of stone or even cast in concrete so it’s up to the woodworker to use his or her judgment to decide how many are needed. The wood here is 66 mm wide.
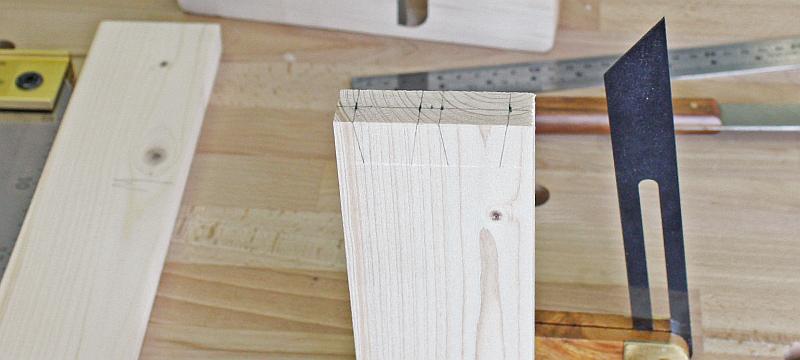
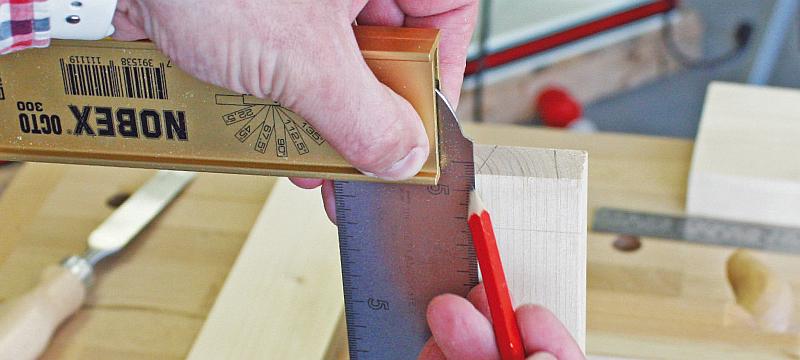
In the last step of marking out, we will draw a straight line on the edge with a square. Using a square, we draw lines of 1:8 slope onto the surface. Be exact, better safe than sorry. Mark out the parts we will cut out.
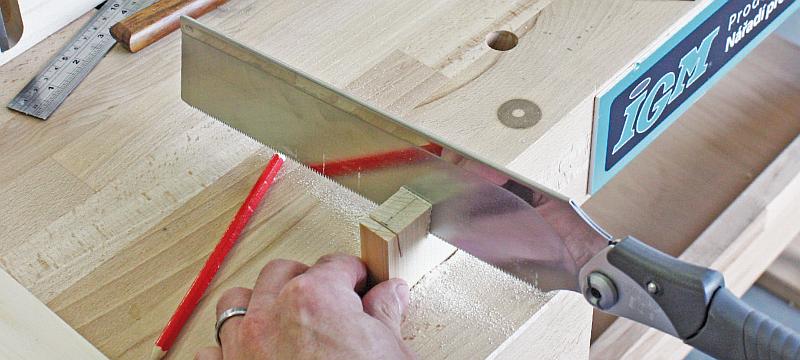
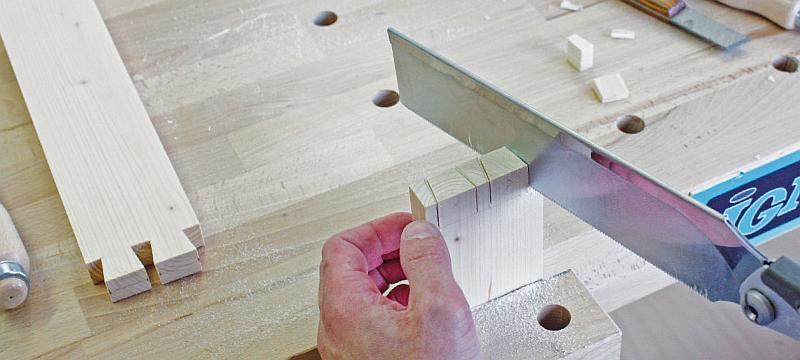
Now it's time to make some sawdust. Accuracy is imperative, cut precisely and finish the cut slightly above the line of depth. Should you encounter any difficulties, practice on a piece of spare wood beforehand.
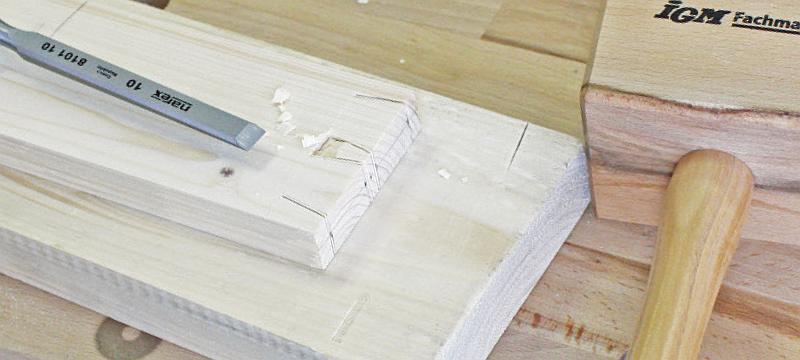
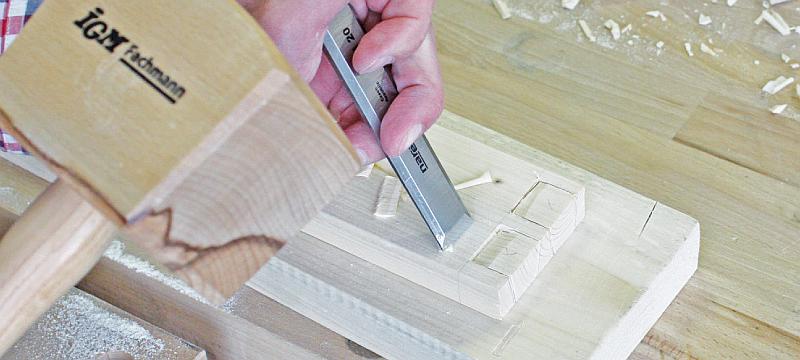
After removing the pins, it's time to clean up the cut and smooth out the edges. Use a really sharp chisel and a mallet, other shortcomings may be cleaned up with a small saw. You can clean up with a coping saw as well but be sure to leave a 1 mm of wood to remove with a chisel.
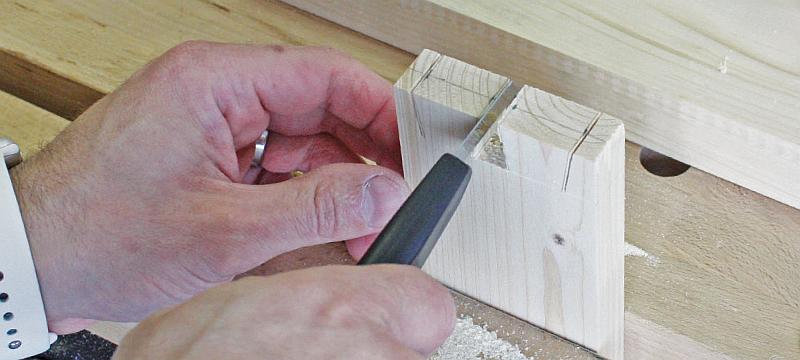
Use a small knife to clean up as well. Marking knife works pretty well. These knives are brittle and tend to break, so work carefully. You may also use a narrow chisel.
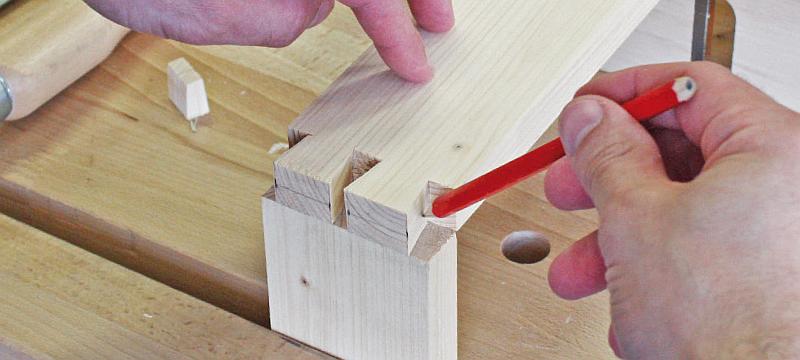
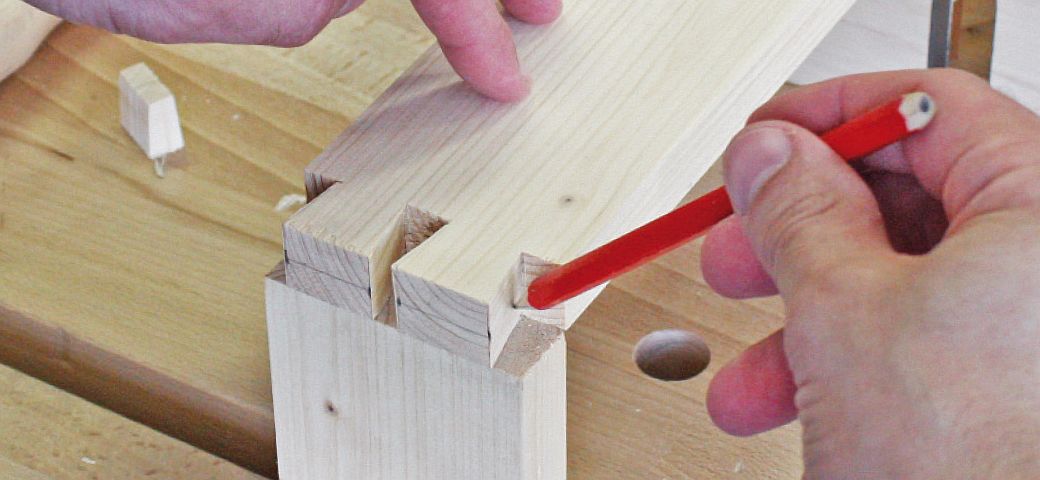
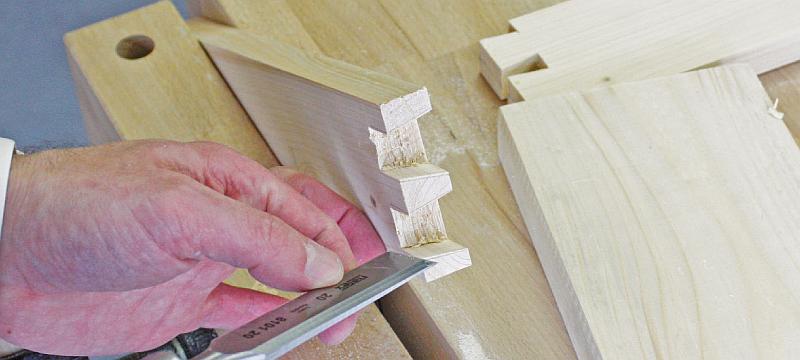
Now it's time to draw the pins on the edge of the second piece of wood. Clamp the piece in height of a plane and use it for support. Place the cut-out piece on the edge and on the plane. Use a pencil or a small knife to redraw the pins.
Draw a straight line from the redrawn dovetails up to the marked out depth. Now we've prepared the cut.
So again, let's make some sawdust. Accuracy is imperative, cut precisely and finish the cut slightly above the line of depth. To make the cut accurately, redraw the straight lines on the back side of the workpiece as well.
Now it's time to clean up the cut. Again, use a chisel and a mallet.
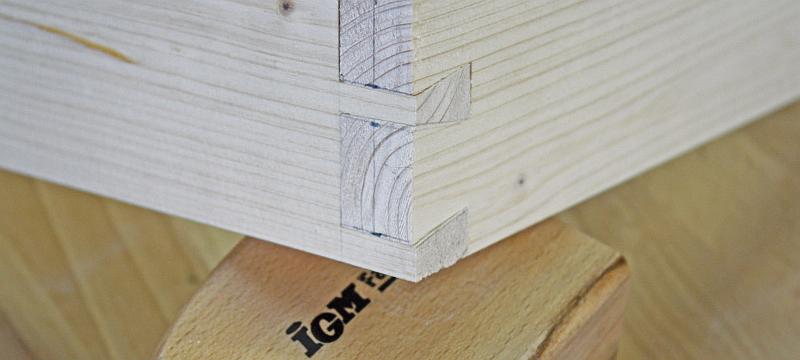
Use a mallet to knock the joint together. The joint should sit perfectly without having to use force.
The draw lines will be visible, they can be removed simply with an abrasive, however. A small sharp plane will remove any uneven parts.
Now you know how to make a dovetail by hand. The instructions are the same when making a box. If you want to be surer when making a dovetail, practice on regular basis.
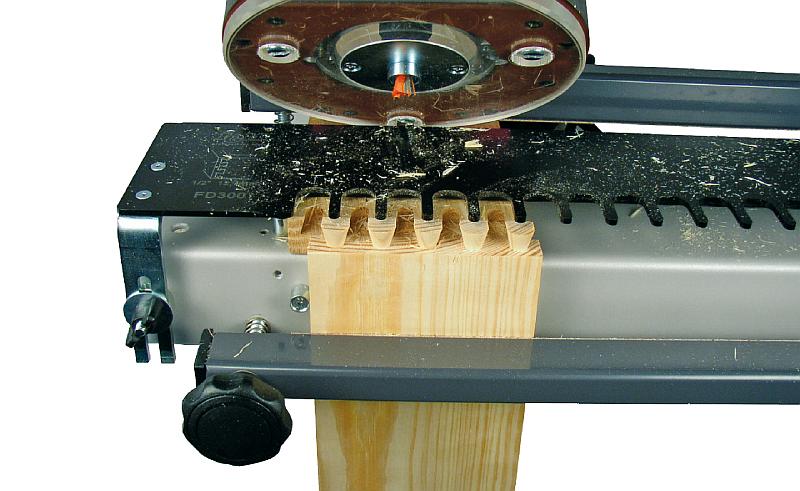
But if you're running out of time and don't want to make the joint by hand, you can use our FD600 Dovetail Jig or the smaller version FD300.
Back to what's new